How the Internet Works (The Simple Version)
Think of the internet as a massive global delivery network. Every time you open a browser and visit a website, a fast two-step conversation happens:
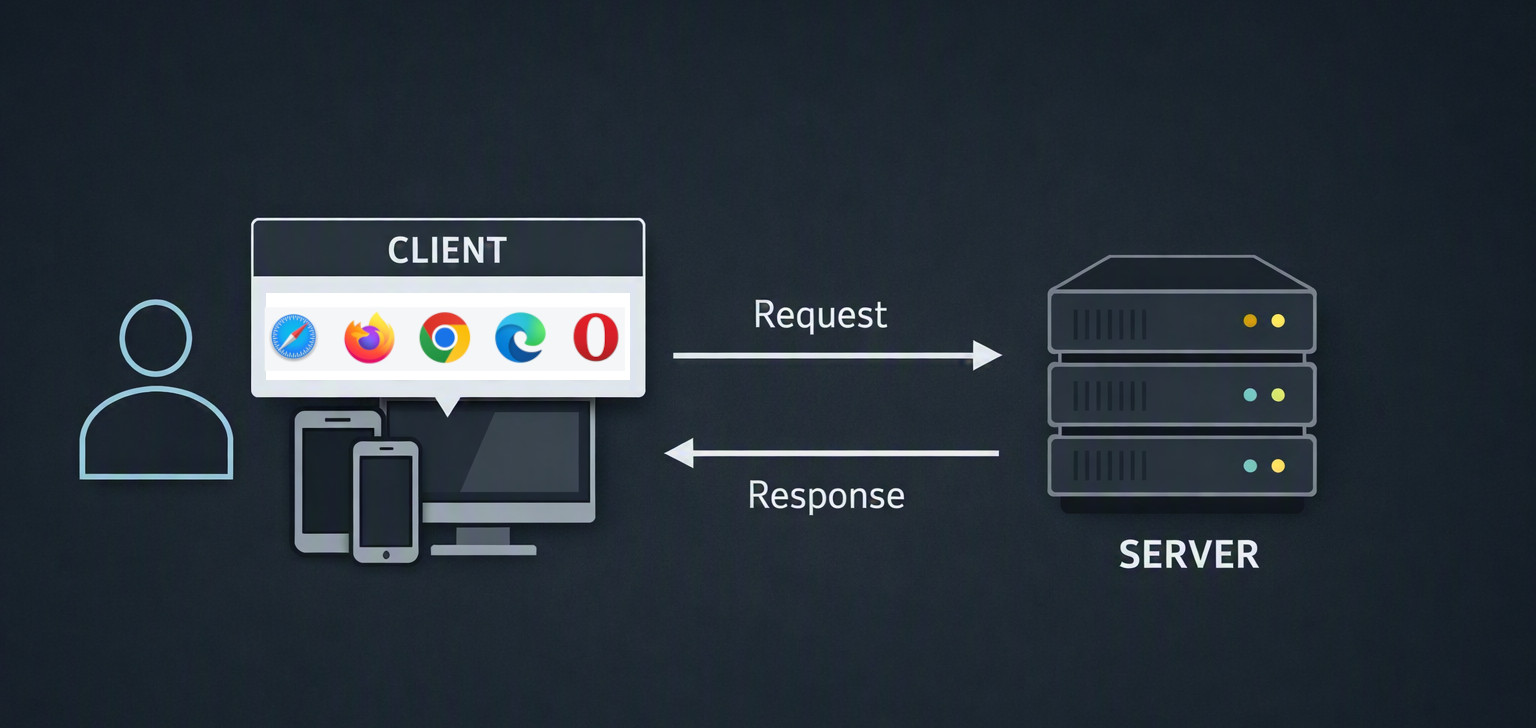
The Request (The Client): You (the "Client") type a web address into your browser. Your browser sends a message across the internet asking for that specific page.
The Response (The Server): A powerful computer far away (the "Server") stores the website's files. It hears your request and beams the files back to your computer.
The Three Pillars of the Web
Every website you have ever visited is built using a combination of three core technologies:
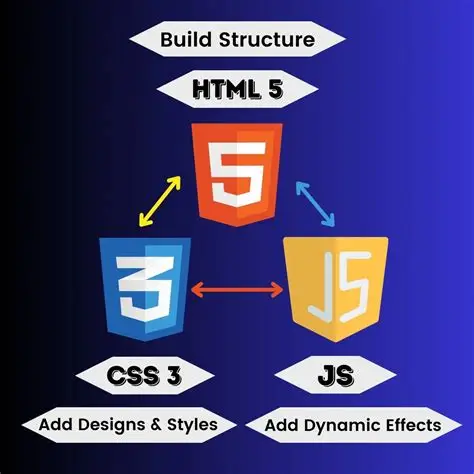
HTML (The Skeleton): Defines the raw structure and text of the page. It tells the browser, "This is a heading, this is a paragraph, and this is an image."
CSS (The Clothes): Controls the design, colors, fonts, and layout. It tells the browser, "Make that heading large, blue, and center it on the screen."
JavaScript (The Brain): Adds logic, movement, and interactivity. It tells the browser, "When the user clicks this button, pop up a congratulations message."
Setting Up Your Workspace
Professional developers don't use Microsoft Word or Notepad to write code. They use specialized software called a Code Editor. We will use Visual Studio Code (VS Code) because it is free, powerful, and the absolute industry standard.
Step-by-Step Installation
Download VS Code: Go to Visual Studio Code and download the installer for your computer (Windows, Mac or Linux).
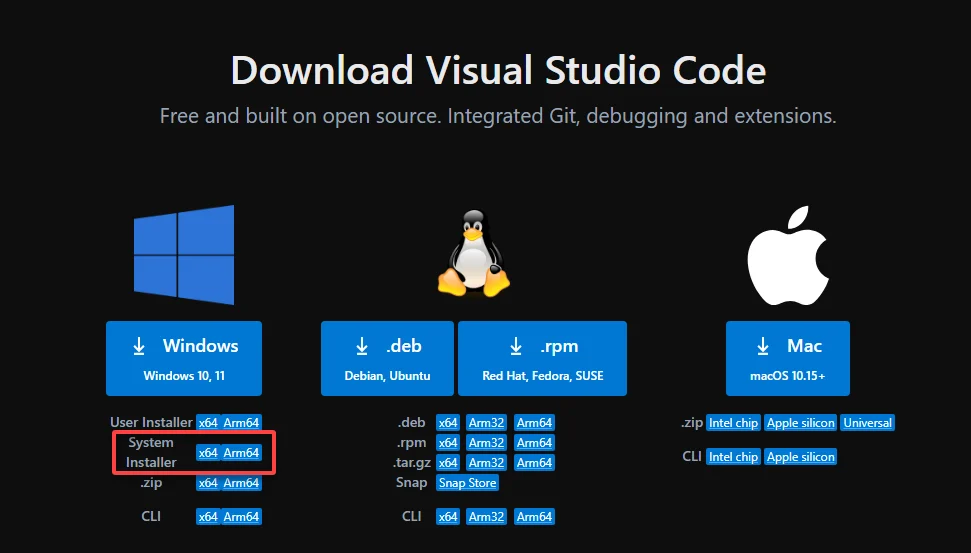
Install: Run the downloaded file and follow the default installation prompts.
Open It: Launch VS Code. You will see a clean, dark workspace interface ready for action.
Installing Your First Extension
Extensions are like apps for your code editor that give it extra superpowers. Let's install Live Preview, which lets you see your website update in real-time as you type.
Click the Extensions icon on the far-left sidebar of VS Code (it looks like 4 small squares).
In the search bar at the top, type:
Live Preview.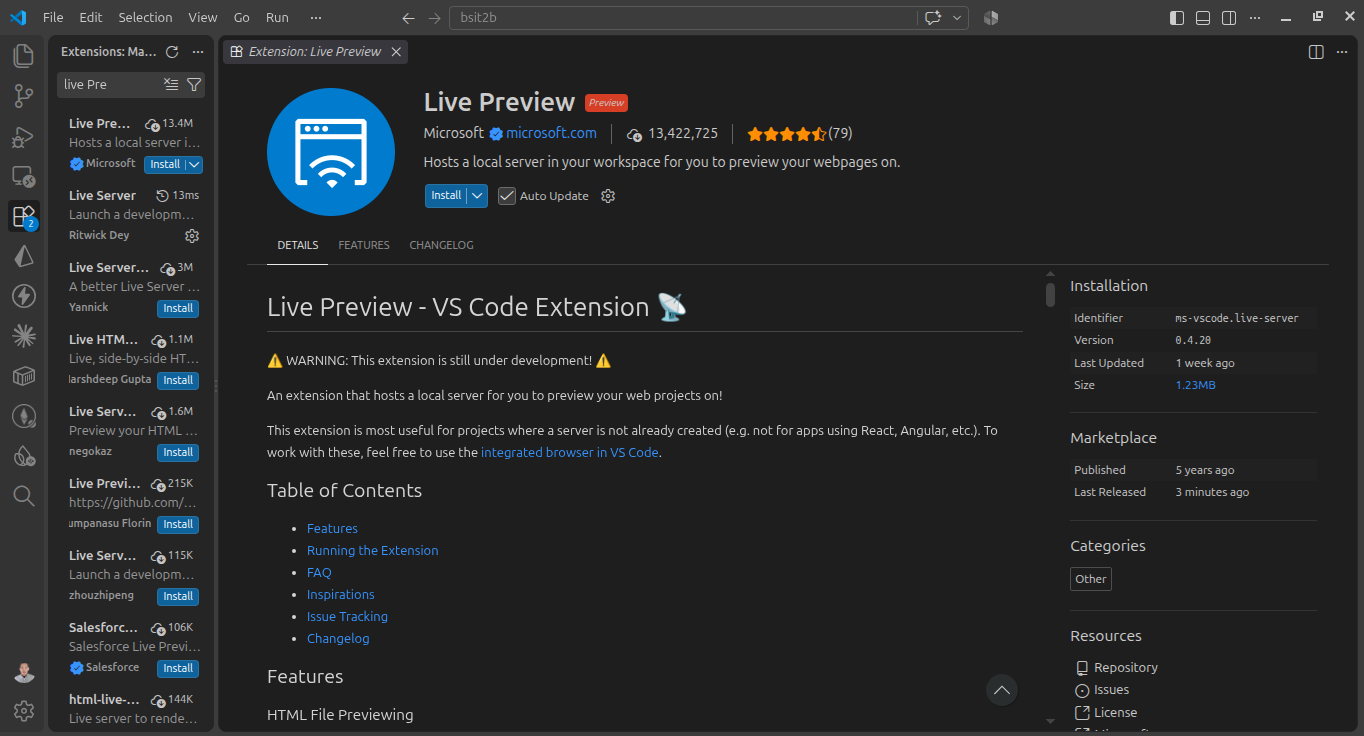
Find the one created by Microsoft and click the blue Install button.
Your First Action Step
Before we write our first lines of HTML in the next lesson, let's make sure your environment is fully ready.
To proceed, the following tasks should be completed:
Successfully installed VS Code on your computer.
Manage to find and install the Live Preview extension?
Once you confirm your setup is ready, you can now proceed to the next lesson.